REPAIRING THE FANATEC CLUBSPORT FORMULA WHEEL PINS
This page will hopefully help you if you experience the frustrating, but all too common, issue of a pin breaking in the Fanatec Clubsport Wheel base from your Clubsport wheel quick release.
Please note, this does involve opening up your wheel, so will invalidate any warranty. You have been warned.
This guide will deal with the Clubsport Formula wheel, as that is the one I have, but I cannot see the other wheel being much different. There are spare pins in the plug to enable this repair!
You will require the following tools;
- Soldering iron & solder
- Fine scissors
- Fine flat blade screwdriver
- 3mm Allen key
- 2.5mm Allen key
- 2mm Allen key
- Heat-shrink or tape
- Hot glue gun
- Patience
The steps in the first two pictures can be skipped, there is no need to remove the Quick Release collar to gain access to the insides. If you do take them off, it’s a good chance to re-grease the ball bearings. Thanks go to Stephen Garemogg on the iRacing forum for pointing that out.
1) The first step is to remove the split ring that holds the quick release collar mechanism on. I found the best way was to push the collar down and to then use a fine flat blade screwdriver to prise the ring out of its groove at the joint indicated in the picture. Once the ring is off, you can remove the collar and spring.
2) When the collar and spring are removed, the ball bearings will be exposed, so be aware of them rolling away. The shaft and bearings will be slightly greasy, so mind your hands. The ball bearings locate from outside in, so if they’re going to fall out, it’ll be away from the inside.
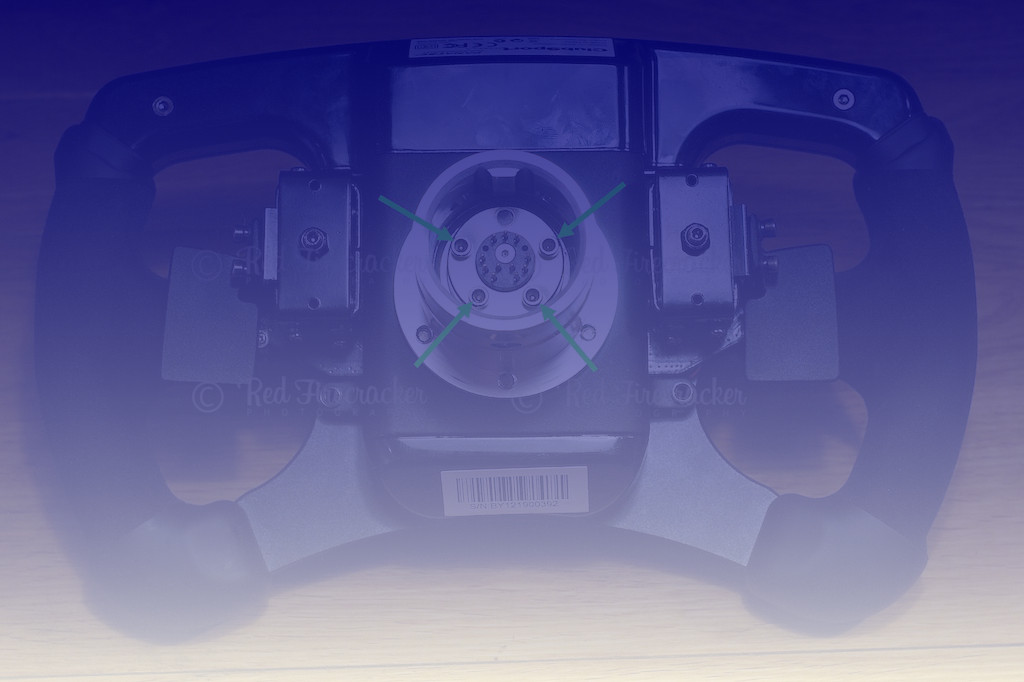
3) Now we need to remove the four Allen bolts indicated in the picture above, with a 2.5mm Allen key, which will release the central rear section, giving us access to the cabling for the central connection. As will be seen in the next image, it is wise to do this section with the wheel flat and steady.
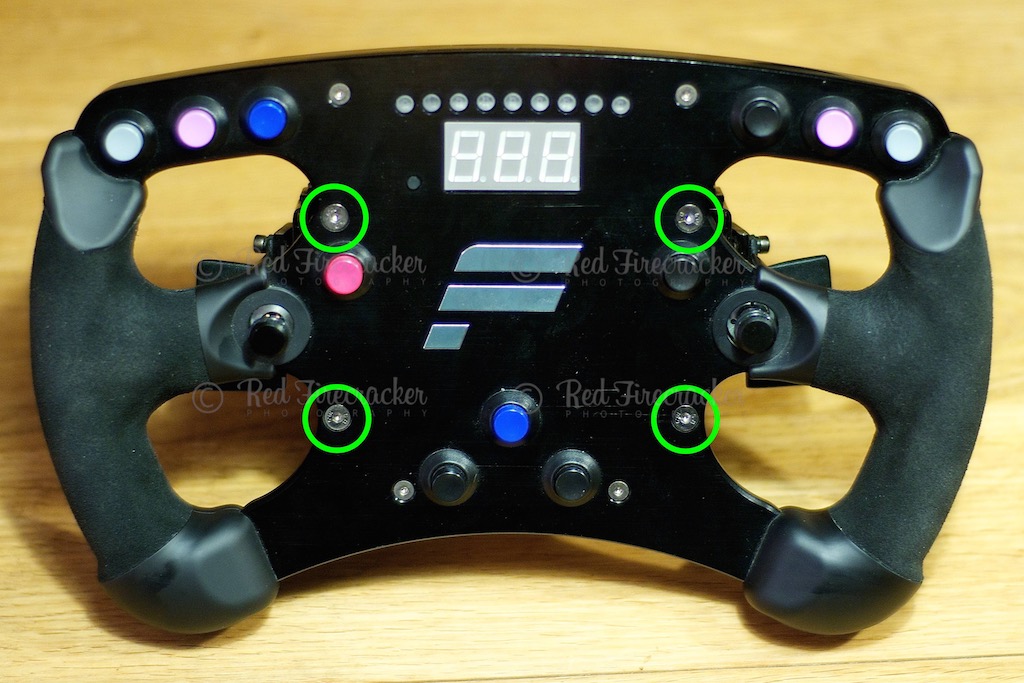
4) In this image we can see why it is wise to keep the wheel flat whilst removing the Allen bolts. There are four metal spacers that sit between the wheel body and centre section that will fall out, or more likely in, when the bolt is removed.
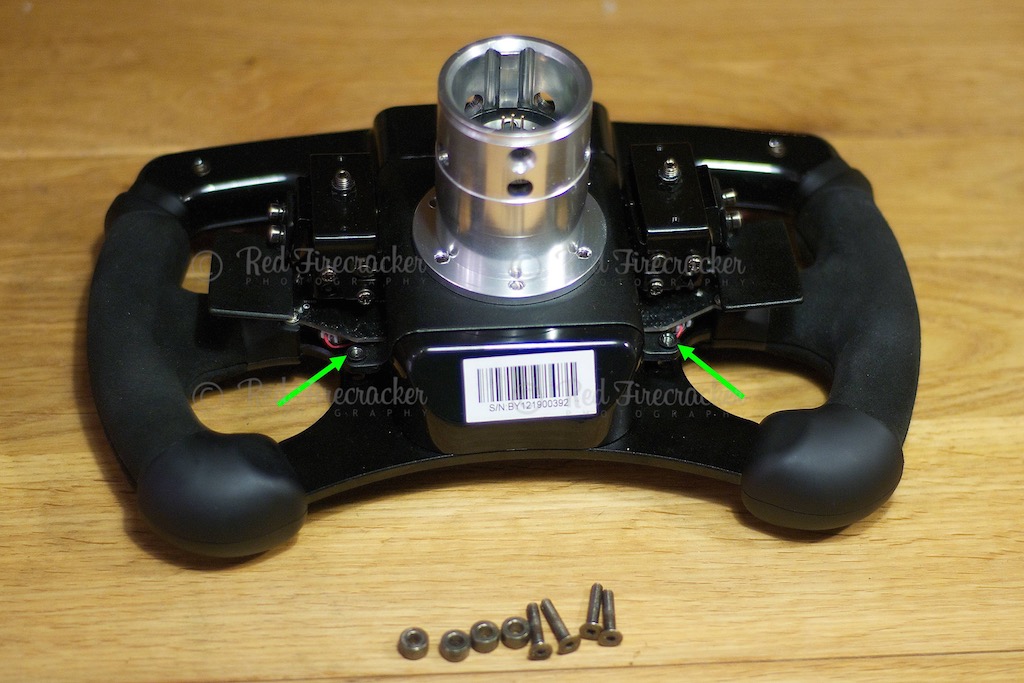
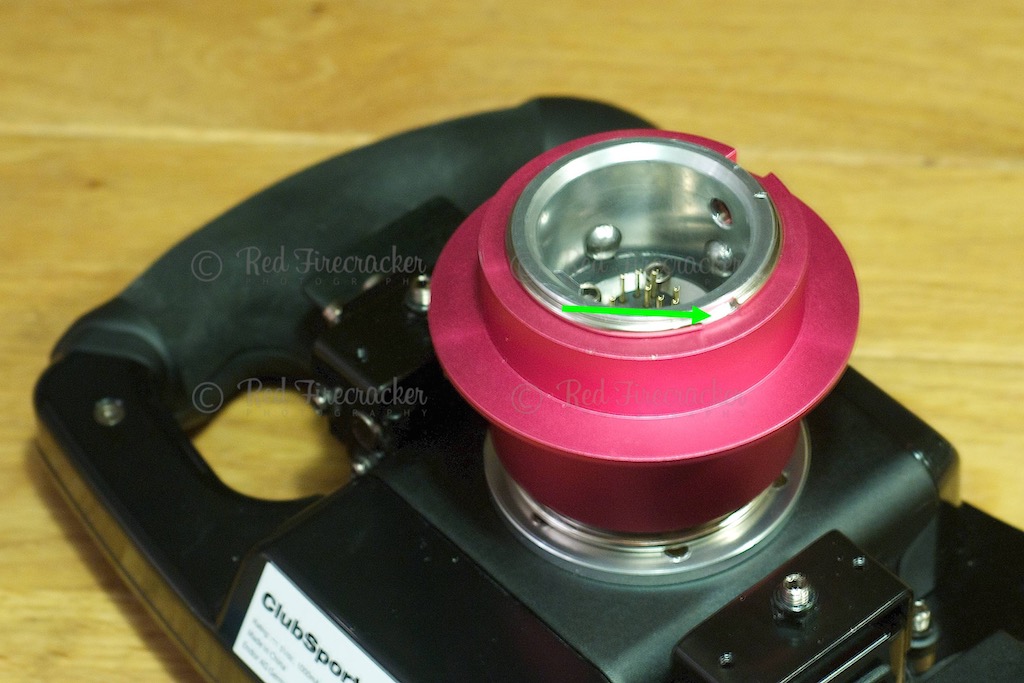
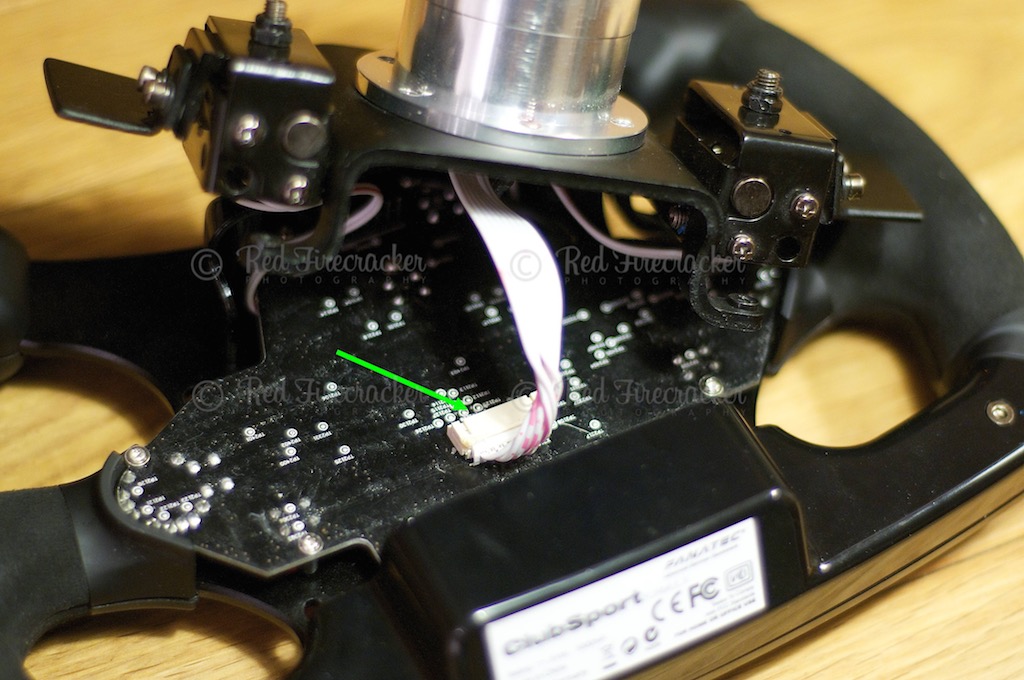
5) With the centre section free, it can be raised up to reveal the connector for the wires from the central plug. Carefully, using the thin flat bladed screwdriver, gently prise the plug out of the socket. Take care not to slip or to damage the circuit board.
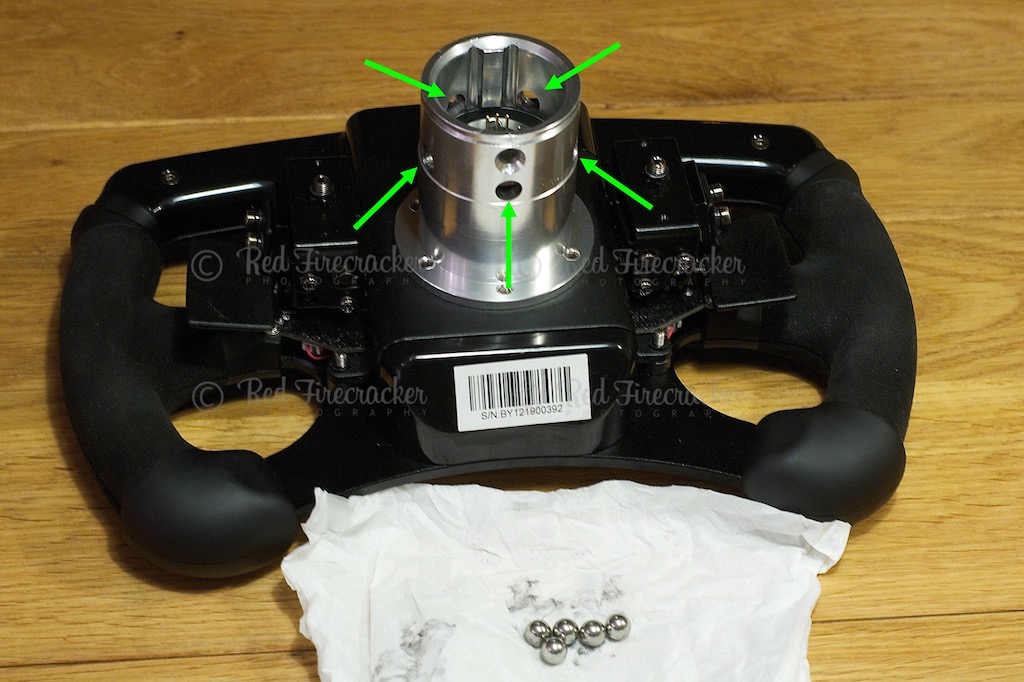
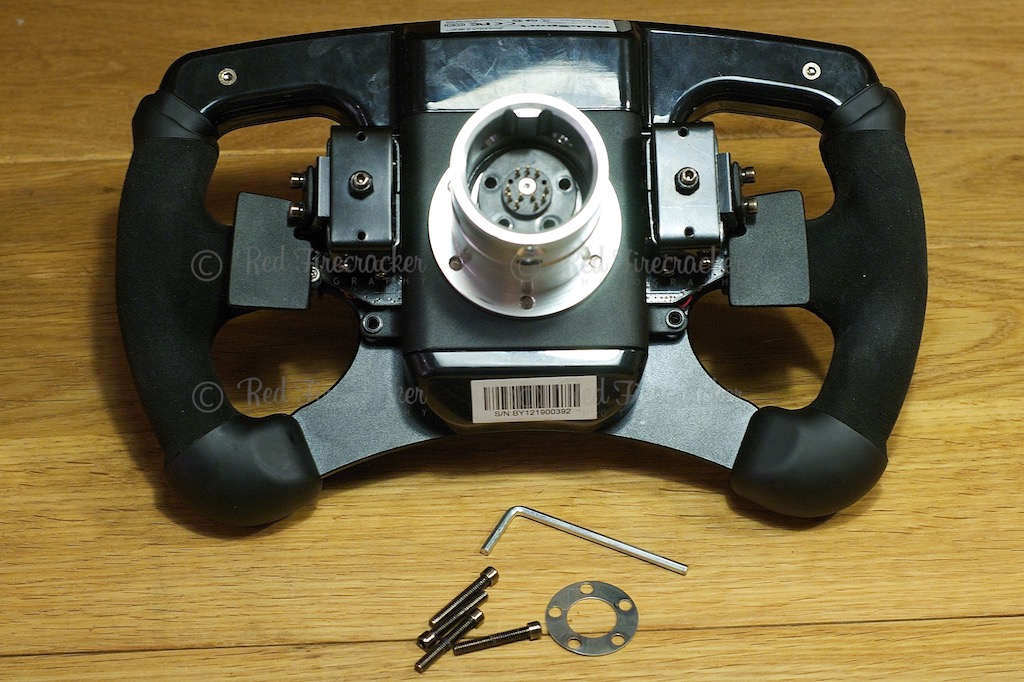
6) Place the central section back into position and using a 3mm Allen key, remove the four Allen bolts holding the central plug in position. Take care not to slip, else you may further damage more pins.

7) With the four bolts removed, the metal ring can also be removed. The plug and wiring can now be slid out of the central shaft. It can only be fixed back in in one way, so there is no worry of getting the alignment wrong when reassembling.
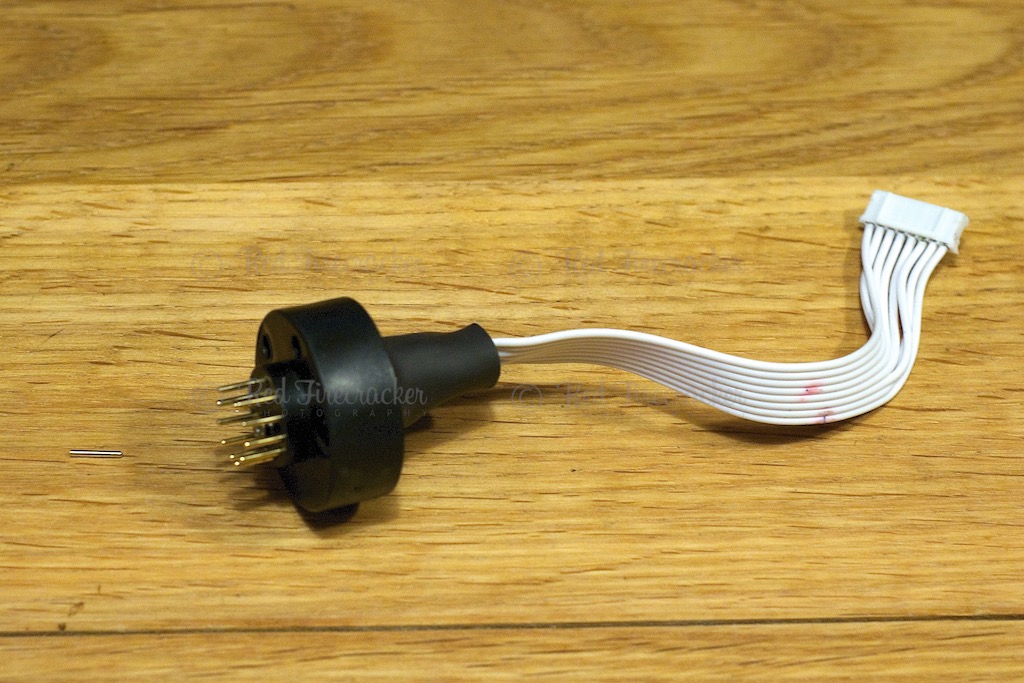
8) Below is the plug and wiring as removed from the shaft. The heat-shrink at the end can be carefully sliced and removed to expose the ends of the pins.
9) Now we need to remove the central Allen bolt to enable us to split the plug in half. Using a 2mm Allen key, undo and remove the bolt.
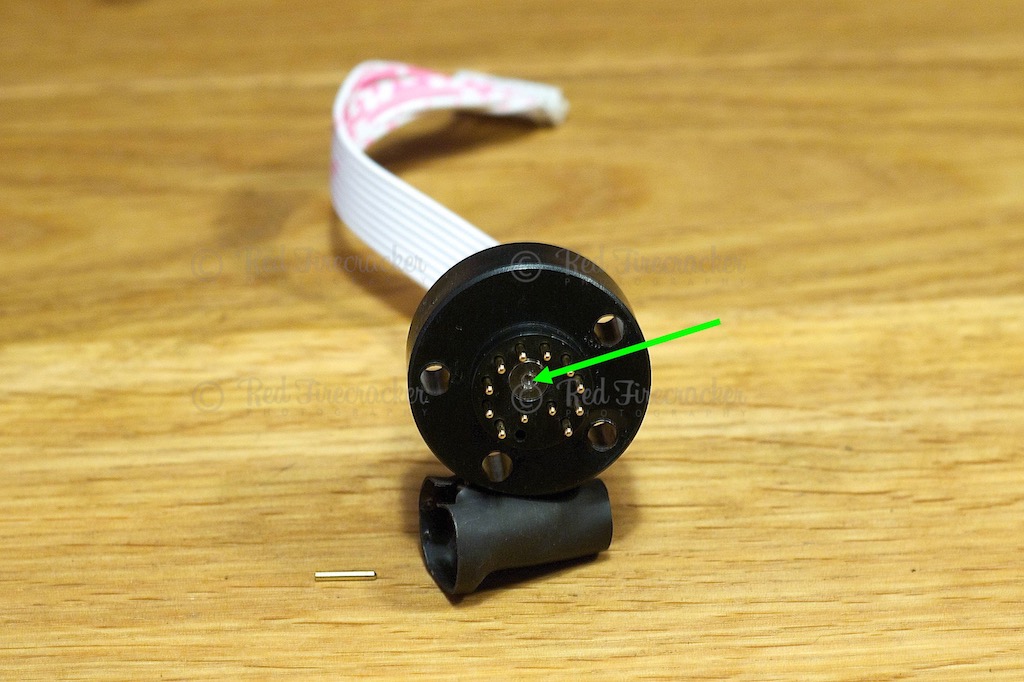
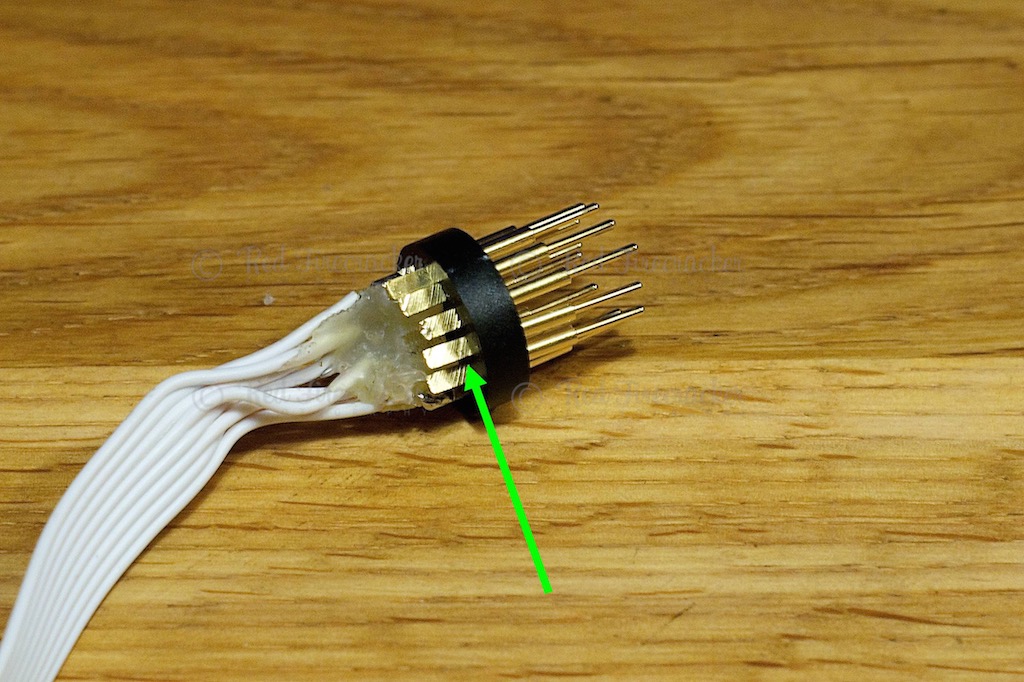
10) Now the central part of the plug can be withdrawn from the outside. Take car, as the pins are located in the outer casing, so be sure to withdraw without bending. Two things can be now be seen. Firstly, the wires are hot glue gunned into place, for stability, but secondly and most importantly, there are five spare pins. These can be used to repair your broken pins.
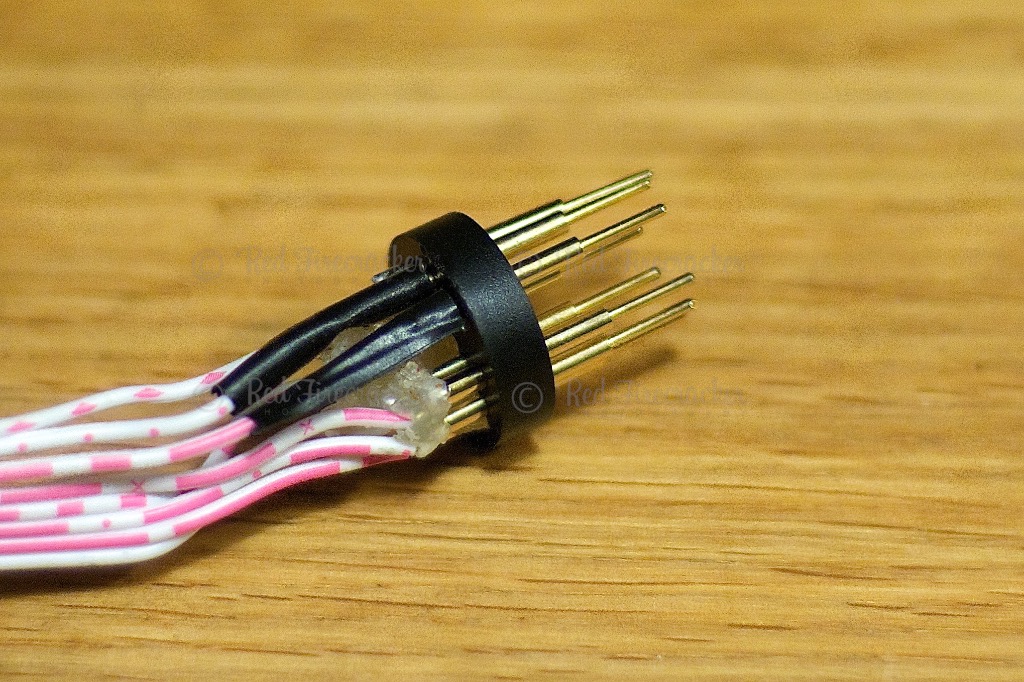
11) To free up the broken pin, firstly de-solder the wire from the pin, taking car not to get the pin too hot so as to melt the plastic holder. I then found it easier to cut the top of the broken pin off to withdraw it from the holder. The spare pin is then tinned, located back into the holder and the wire then soldered to it, again being careful not to get it too hot. As can be seen, I was clumsy and broke a second pin. I then protected the joints, I would recommend using a hot glue gun to fully secure. Now the wheel can be re-assembled, simply reversing the disassembly process and all should be well again. I would strongly suggest leaving it attached to the base though. Happy racing!
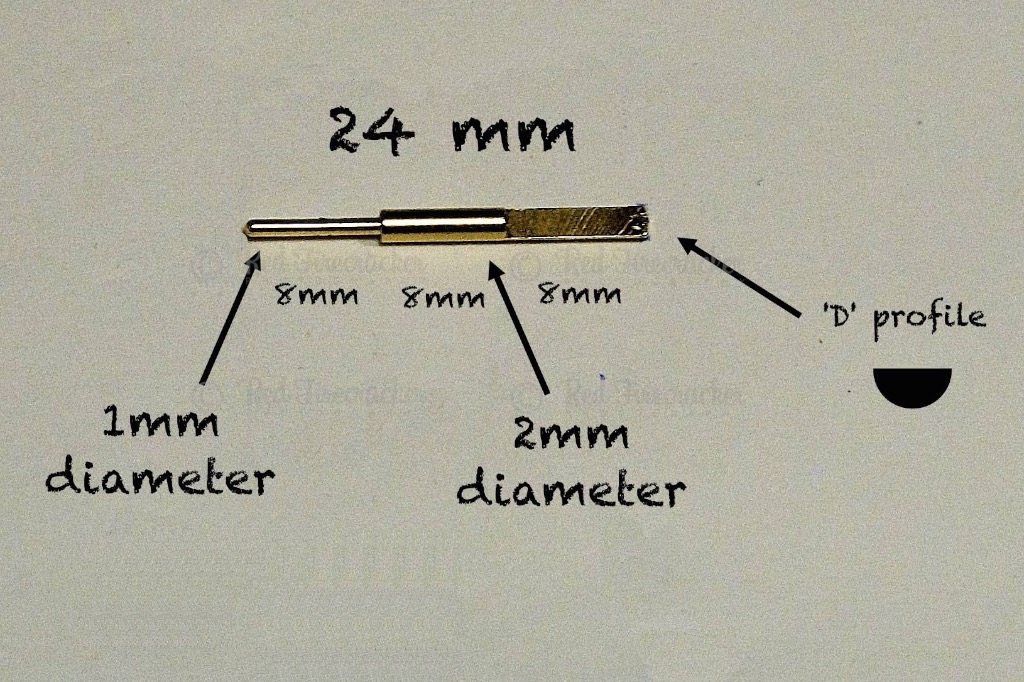
Below are the details of the pin. I am looking to see if they are available as spares (they should be).
If you have no spare pins left, this newly made part to completely replace the pin unit is now available from SimRacingMachines (no connection to me):